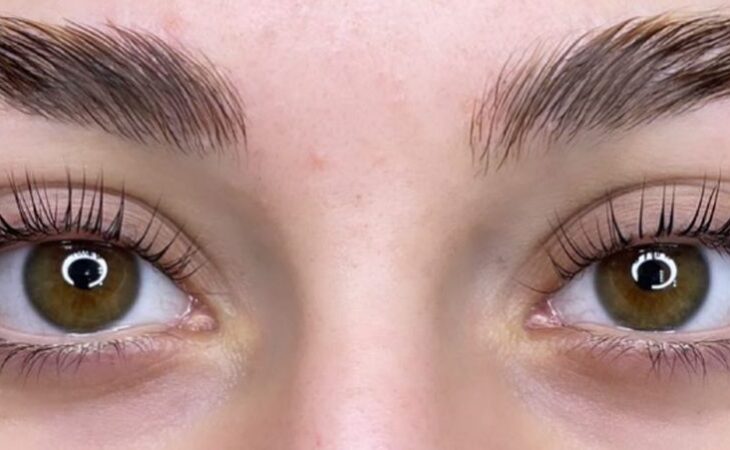
Do you dream of beautiful and curled lashes without the need to use an eyelash curler every day? Lash lamination and lash lift are methods that can make your dreams come true! I’ve personally tested various kits to find the best one for you! From this post, you’ll learn everything you need to know about effective lash lift and lamination.
What is Lash Lamination?
Lash lamination involves applying a special conditioner to the lashes that smooths and shines the hairs. This makes the lashes stronger, more flexible, and gives them a beautiful sheen. The lamination also helps regenerate lashes that have been damaged by frequent use of mascara or false lashes.
What is a Lash Lift?
Lash lift lifts and curls natural lashes, giving the effect of an open eye. It involves attaching lashes to silicone rods and then applying special formulas that curl them durably. With good products, the effect lasts for up to 8 weeks.
Why Should You Opt for Lash Lift and Lamination?
There are several reasons to do lash lift and lamination at home.
Here are the ones I found:
- Natural beauty – it enhances your natural lashes wonderfully, adding volume and shine;
- Time-saving – you can forget about curling your lashes with an eyelash curler or applying mascara every day, letting you set your alarm for a later time;
- Durability – with high-quality and strong products, the effects last up to 2 months;
- Lash regeneration – they nourish and strengthen your lashes;
- Versatility – it can be done on lashes of various lengths and volume, making the eyes look like a million bucks!
What advantages of lash lamination and lift do you know? I’m waiting for your comments below the article.
How to Do Lash Lift and Lamination at Home?
Remember, the first thing you need to do is to clean your lashes from makeup and other impurities properly. Use gentle products that you trust.
The next step is attaching the silicone rods to your eyelids. Only then can you apply the lifting formula, which softens the lash structure. After that, comb the lashes onto the rods. Don’t forget to apply a setting formula that locks in the new lash shape.
After completing the lash lift, you move on to applying the laminating conditioner, which smooths and adds shine to the lashes. The last step is removing the rods.
The whole process takes about half an hour. However, the time may vary depending on the kit you use and the result you expect. Regardless of the kit, follow the step-by-step instructions.
Best Kits for Lash Lift and Lamination
Now we come to the most exciting part – the kits I recommend.
1. Nanolash Lash Lift and Lamination Kit
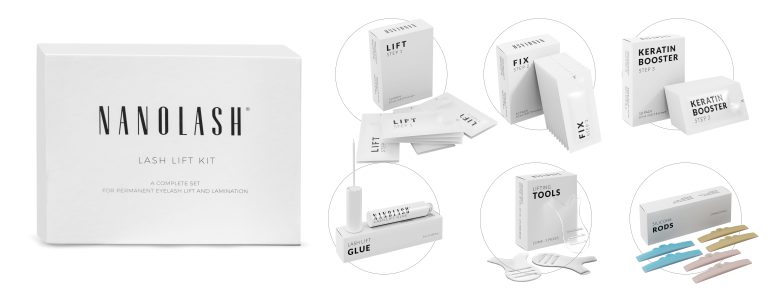
This is the best choice, in my opinion. Nanolash is a brand known for high-quality lash care products. Their lash lift and lamination kit contains everything you need to perform professional lash lift and lamination at home, including glue, activator, neutralizer, conditioner, rods, and combs.
One of its biggest advantages is that it’s a complete kit containing all necessary products, so you don’t need to buy any extras. Everything comes in one box!
The high quality of the products is also a big plus. The items are top-notch, containing natural oils and keratin, which strengthen the lashes. The effects of the lash lift and lamination last up to 8 weeks! The box Nanolash includes 10 sachets of each product, each containing 0.5 milliliters. If I can do 10 lash lifts for this price, there’s no question why I chose this kit.
2. Thuya Lash Lift Kit
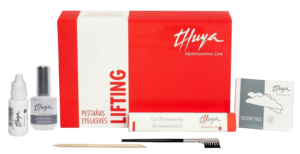
This Spanish brand specializes in lash and brow styling products. Their lash lift and lamination kit has received good reviews from users, so I decided to try it. I don’t regret it at all!
The Thuya kit is also easy to apply and has long-lasting effects. My lashes were nicely curled and nourished for 7 weeks. It’s a bit shorter than with the Nanolash kit, but still decent.
However, despite the kit being quite substantial, as it includes products for the lash lamination and lift, it lacks a conditioner. You can purchase an argan cream separately to nourish the lashes, but it’s not included in the kit. For me, that’s a major downside… The kit contains glue, gel, neutralizer, and rods.
3. MIYA LASH Keratin Lash Lift Kit
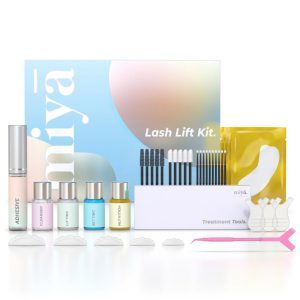
This lash lift kit contains keratin, which strengthens the lashes, which is especially important for delicate lashes. Like the Nanolash kit, MIYA includes all necessary products, so you don’t need to buy extra conditioners or accessories. The kit contains glue, activator, neutralizer, cleaner, nourishing serum, brushes, applicators, eye patches, and more.
The kit lasted about 5 weeks on my lashes, which was relatively short compared to the previous kits. The effect was decent; the lashes were beautifully defined and nourished. If only it had lasted longer…
4. Zola Protein Reconstruction System for Lash and Brow Lamination
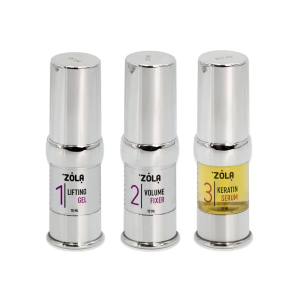
This one tempted me. It’s a convenient option for practical people. If you want to take care of both your lashes and brows, this is an interesting choice. The kit includes products for lifting and laminating both lashes and brows, enhancing the look of your entire eye area.
Its main advantage is versatility, but it’s also rich in nourishing ingredients, especially proteins, which earned it high marks in my personal evaluation. Following the application, both my lashes and brows were visibly enhanced and shiny. The effect was noticeable immediately. The Zola kit contains an activator, neutralizer, and emulsion.
Unfortunately, it’s not a long-lasting option. On my brows, the kit didn’t last even 3 weeks, and on my lashes, barely 4 weeks. Despite my high hopes, it didn’t fully meet expectations.
5. Elleebana Lash Lift – Starter Kit
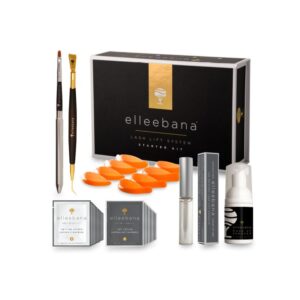
This kit allows you to perform the treatment at home, even if you’ve never done it before. Although it’s mainly aimed at beginners, the results are truly professional! In my case, the effect lasted a bit over 6 weeks.
However, its downside, in my opinion, is the price. It’s relatively expensive compared to other kits, and while the results are good, they aren’t dramatically different from the others.
The kit includes the most important products and accessories, is easy to apply, and gives a subtle, natural refresh to the eyes. It contains sachets of activator and neutralizer, glue, silicone forms, foam remover, applicator, and brush. Despite everything, I probably won’t return to this kit knowing the previous products.
The comparison of these kits is my personal list, you may have a completely different opinion and that’s fine too. Each of us knows our needs best.
And you, which lash lift and lamination kits have you used? Share in the comments!
How to Choose the Right Kit?
When choosing a lash lamination and lift kit, consider a few factors that may influence your decision:
- Your experience – if you’re just starting out, choose a kit with clear instructions and all recommended products.
- Condition of your lashes – if you have delicate or damaged lashes, look for kits with nourishing ingredients to rebuild them.
- Budget – prices vary significantly, so adjust your budget to the quality of the products.
- Effect you want to achieve – some kits offer a more natural look, while others provide stronger effects. Think about which result is best for you.
If you’re still unsure, check out my number one recommendation!
Remember, lash lamination and lift are perfect for those dreaming of beautiful, curled lashes without daily makeup. With the available kits on the market, you can perform them yourself at home.
If you decide to buy a lash lamination and lift kit, I especially recommend the Nanolash kit, which offers the best value for money and long-lasting results. No matter which kit you choose, take regular care of your lashes, and you’ll enjoy a beautiful gaze for a long time!
